Wednesday, November 30, 2011

Forensics Project Part IX: Poison Analysis

In class, we did an experiment where we tested various substances at six stations around the room to first identify whether the mixture was a poison and then determine whether the substances were the specific type of poison that station’s reagent was testing or not.  We were separated into groups of four and at each station there were specific reagents which would check for a certain type of poison: a household cleaning product, aspirin, cyanide, metal poison, sugar or iodine.  As we rotated around the room we would test the sample’s pH and its classification (household cleaning product, aspirin, cyanide, metal poison, sugar, iodine) and then record our results for each station.  Before we started the experiment however, we had a discussion in class about the various ways to poison somebody with little chance of being caught.  We learned that if one is trying to murder somebody who is diabetic, they can continuously feed them doses of sugar until they overdose.  We also learned that those with Thyroid conditions can be poisoned by iodine.  I thought this was rather interesting because the best way somebody could kill someone by poisoning is by making the murder look like an accident and these previous examples show just that.  Learning this allows me to better imagine what happened at a crime and know more about the different situations that could be encountered by crime scene investigators. 

Forensics Project Part VIII: Drug Analysis

In class, we did an activity which simulated the testing for the drugs LSD and cocaine.  Of course, we could not use the real drugs in school so we used substances that would create the same results as the real drugs when exposed to the drug’s revealing reagent.  Six stations were set up around the room with unknown drugs to be identified as LSD or cocaine by the students who would rotate in groups around the room to each station.  At each station was a beaker filled with approximately 25ml of water and the unknown drug mixed thoroughly together.  The groups would then use a pipette to drop a couple of drops of the mixture into a provide plate and test the pH of the substance.  We would then rinse out the plates and add a couple more drops of the solution to the plate (in separate piles) and put a drop of each of the revealing reagents into the separate mixture piles to determine which drug the station held.


Background Research on the Drugs:
Cocaine
Chemical Name: benzoylmethylecgonine
Chemical Formula: C17H21NO4
pH: 8
Biochemical Tests: chromatographic techniques can easily distinguish and separately measure each of these substances

LSD
Chemical Name: Lysergic acid diethylamide
Chemical Formula: C20H25N3O
pH: 4
Biochemical Tests: comparing the hallucinogen LSD with lisuride, a structurally similar drug that also acts on serotonin or 5HT2A receptors but is not hallucinogenic

Forensics Project Part VII: Footprint Analysis

In class, we did an activity which involved a group of four students analyzing each other’s footprints in the dirt from a simulated crime scene.  Each group had a bin filled with dirt to represent the ground at the crime scene.  Each student in the group would press their foot into the dirt leaving a print behind.  We then would record the weather conditions (which would be the same for each trial), which direction the print was going, the length and width of the print and any designs on the sole of the shoe.  There was a boy (Brad Caison) and two other girls (LaTaysha Stokes and Jenifer Perez) in my group besides myself.  When we observed his print, we noticed Brad had rather large feet because he is a male and that was seen in his print.  Jenifer had a very small print and LaTaysha was wearing a type of combat or construction boot so when one analyzed her print it appeared to be a male’s print instead of a female’s.  When we analyzed my print we observed that more pressure is put on my heel instead of being equally distributed like the others'. 
  My Footprint:

Saturday, November 26, 2011

Forensics Project Part VI: Witness Experiment

            In class, in our groups of three or four, we did an activity which tested our ability as an eye witness and whether or not we were good witnesses.  First, each person in the group found a similar sized face in a magazine.  If the faces were too different in size it would be too easy to recognize which facial features belonged to which face.  We then cut out the features of each face (hair, eyes, nose and mouth) and reassembled the faces to make an accurate portrayal of what the face originally was.  Each person then disassembled the faces and passed the pieces to the person on their left.  That person would then put the pieces together to make the original face.  After that, each person put each feature into a designated pile in the middle of the table (one pile for eyes, one pile for hair, one pile for noses and one pile for mouths) mixing up all the facial features of the different faces.  Finally, everyone would reassemble their original faces from the piles at the middle of the table.

            This activity, in my opinion, was rather easy.  I do, however, believe it would have been more difficult if there were more people in my group because I only had two other students besides myself doing this activity with me. 


Forensics Project Part V: Create a Profile

In class, we were separated into groups of four or five to analyze five different clues found at a fake crime scene and make a profile of the criminal and the crime.  The clues were labeled one through five. Clue one was a set of four fingerprints from the right hand of somebody at the scene of the crime labeled one through four.  Our group identified print one to be a plain whorl, print two and three to be a double loop and print four to be an ulnar loop.  Clue two was a hair sample and when our group observed the evidence we thought it looked like it came from a Caucasian person with light brown or blonde hair.  Clue three was a note left by the kidnapper or murderer saying “You will never find her!”  The handwriting in the note looked loopy and could have possibly been written by a female.  This also let us know the victim was a female.  The handwriting also looked rushed meaning the criminal felt rushed.  Clue four was another hair sample which the grouped determined was from a dog or cat.  In the end we decided it looked more like cat hair than dog.  Clue five was a red fluid on a piece of paper.  Our group never identified what this was and I still do not know what it is. 

After observing and identifying all of these clues our group created the profile of the criminal and the crime.  We determined that there was a female victim, the criminal could also possibly be female due to the writing, the criminal looked rushed due to the writing in the note, the criminal seems to be instigating the crime investigators due to what the note says, either the victim or the criminal has light brown or blonde hair and either the victim or the criminal owns a cat. 
            Finally, after creating the profile from the known information we obtained from the evidence our group determined what the next steps in this investigation would be to continue on in the investigation.  We said that further testing would need to be taken on clue five to determine what it was and to find the victim to see if clue two (light brown/blonde hair) belonged to her and whether or not she owns a cat.     

Forensics Project Part IV: Lipstick Print Analysis

1. Day One of Lipstick Analysis

            In class, we did an activity which involved each person to analyze a print of their own lips.  Each person would put on lipstick or lip gloss and press their lips against a blank notecard.  We would then wipe the lipstick from our lips (or keep it on, whatever we preferred) and look at the print left on the card.  Each student would then identify distinct characteristics of their lips on the print left on the card.  For instance, on the print of my lips I noticed that my lips were rather full and they were horizontally long.  I also observed that my top and bottom lip are similar in size and that there is a very small dip in my upper lip.  There were also many small striations in my lips that could not be seen until the print was looked at more intently.


2. Day Two of Lipstick Analysis

            The next day in class, each group (4 or 5 students) was given a different group’s lipstick prints to analyze and then they were told to try to figure out who they belong to.  I, however, was not attending school that day therefore I did not take part in this activity and cannot give sufficient information about what took place besides what the activity was about.

Sunday, November 20, 2011

Forensics Project Part III: Handwriting Analysis

1. History of Handwriting Analysis

- Over 2000 years ago, Aristotle noticed the correlation between handwriting and personality.  The Chinese were also independently making observations that there was a connection between character and writing.

- 1622
Italian physician and professor of philosophy at the University of Bologna published a book describing the analysis of character through the study of handwriting.

- Late 1800’s
Abbe Michon, who was the headmaster of a school in Paris and a respected intellectual, wrote several books on the subject.  He coined the name "graphology.”  His successor, Crepieux Jamin, later classified the many features of graphology into a comprehensive system.

- 1890’s
In Germany, Dr Ludwig Klages, a philosopher and graphologist, applied gestalt theory to graphology.  This advanced his theories of rhythm and "form level" and gratly expanded the scope of graphology.

- 1920’s
After World War I, interest in graphology continued to spread in Europe. In Germany, Ludwig Klages published his finding in Zeitschrift fur Menschenkunde (Journal for the Study of Mankind).

- 1929
Milton Bunker founded The American Grapho Analysis Society teaching Graphoanalysis.

- 1942
Thea Stein Lewinson and J. Zubin altered Klage's ideas, based on their experience working for the U.S. Government and published their methods.

- 1972
Discussions between the American Handwriting Analysis Foundation and the American Association of Handwriting Analysis started, with the goal to form a single organization. 

- 1976
These discussions resulted in the creation of the Council of Graphological Societies.

http://www.edinformatics.com/forensic/handwriting_analysis.htm


2. 12 Handwriting Characteristics

1.    Line Quality –are letters erratic or shaky
2.    Word and Letter Spacing – spaced or crowded
3.    Size consistency – compares ratio of height to width
4.    Continuous - pen lifts or continuous writing
5.    Connecting letters – are capitals and lower-case letters connected and continuous
6.    Letters complete – are letters fully written or partially
7.    Cursive/Printed – cursive printed or both (when)
8.    Pen Pressure – equal ^ and V strokes
9.    Slant – left, right, variable, no slant?
10.  Line Habits – above line, below line, on line?
11.  Flourishes or Embellishments – fancy curls?
12.  Diacritic Placement – correct, misplaced, t’s crossed towards top/bottom, i’s dotted? Dotted to the right/left/centered?


3. Handwriting Analysis Template Activity Analysis

              In class, we did an activity which involved each person creating a writing template for themselves.  The skeleton of the template was provided for us and we were to fill out the rest.  In the first section each person wrote the phrase “the quick, brown fox jumps over the lazy dog” in print and cursive because this phrase has every letter in the alphabet.  Then under that the individual would analyze their handwriting with the twelve handwriting characteristics.  In the next section each person was supposed to switch their templates with somebody else to try and forge their handwriting (print and cursive) free handed.  Finally, in the third section, the templates were switched again to a different individual and they were to forge the phrase, in print and cursive, by tracing.  It was rather easy to tell the difference between the forged phrases (free handed and traced) and the original phrases because the letters were shaped differently and the unique qualities of the original handwriting are lost in the forgeries due to the other person’s handwriting.  Tracing definitely looks more authentic and is easier than free handing because it can mimic the shapes of the letters of the original and all the forger has to do is follow the lines.  Free handing, however, takes a steadier hand and more concentration on the forger’s part.  


4. Check Forgery Activity Reflection

              In class, we did an activity which involved groups of three or four forging checks.  Each person in a group would write a check and sign a false name.  Everybody would then rip apart and crumple up the pieces of the check and switch all the checks from their group (with their writing template) with another group.  My group was able to identify the proper people who did the forgeries because one of forgers (LaTaysha Stokes) had handwriting almost like calligraphy.  We were able to identify the difference between the other two because one of the checks had rounder letters which matched up with Audrey Brown’s handwriting. 


5. Famous Forgery Case

              In 1989, Dorothy Sloan opened a package mailed to her which contained one of the original copies, made in 1836, of the Texas Declaration of Independence.  A collector who has never found an artifact as great as this in her professional career offered Sloan $21,500 for the declaration.  Instead of feeling excitement, Sloan felt that there was something strange about the document in her possession.  Sloan then called her friend Bill Holman, a librarian and master printer, and the two of them went to the Barker Texas History Center at the University of Texas, where there was another copy of the declaration.  At first glance the two documents looked the same but when they looked closer the print on their document was thinner than the one on the libraries copy.  Lead type, the only kind of typed print in Texas in 1836, does not change width.  They thus concluded that the document in their possession was made at a different time after 1836, making in a forgery.

http://www.gregorycurtis.com/greg-art2.htm

Forensics Project Part II: Hair and Fiber Analysis

1. History of Hair and Fiber Analysis

- 1857
In France, one of the first papers on hair analysis was published.
- Early 1900’s
Microscopic examination of hair was established and well used.
- 1931
Professor John Glaister published his work “Hairs of Mammalia from the Medico-legal Aspect,” which became a famous source for hair analysis information.
- 1977
John Hick’s “Microscopy of Hairs: A Practical Guide and Manual” set up the groundwork for the use of hair evidence by forensic examiners.
- 2011
Due to the technology of this age, hair and fiber analysis is now a key part to a forensic investigation.  With the use of microspores and technology which reveals DNA hair and fibers are very helpful in an investigation and are now used to their full potential.

http://jwilliamsforensics.blogspot.com/2009/09/history-of-hair-and-fibre-analysis.html
http://www.ehow.com/about_6102496_forensic-science_-hair-fiber-analysis.html


2. Parts of a Complete Hair


3. Major Types of Fibers

Cotton:


Polyester:

Nylon:


4. Hair and Fiber Collection Techniques
                                              
              There are many techniques used by professional organizations for hair and fiber recovery.  According to the FBI taping, shaking, scraping and picking work well to gather samples from bedding and clothes.  Unique vacuums furnished with filtered containment units work favorably to collect hair from carpets and upholstered surfaces.  However, recovering hair can prove to be difficult when used for evidence due to the risk of cross transfer and contamination; nevertheless special lighting and magnification tools can decrease the chance of contaminating the evidence. 


5. Typical Hair and Fiber Analysis

              Scientists usually use microscopes and fibers from related locations when analyzing hairs and fibers from crime scenes to identify criminals or victims.  Microscopes are often used to determine whether a hair is from a human, the race from which the hair came from or whether it is an actual hair or a fiber.  DNA tests are also used to analyze hair in an investigation.  It can reveal the identity of a person at the scene of the crime.    

              Most of fiber analysis is done through microscopic examinations.  There are not as many parts in a fiber as there are in a hair, but that does not make it less valuable.  When analyzing under a microscope, one must try to find the color, texture, shape, pattern, twist, cross sectional appearance and surface characteristics of a fiber.  Once this is accomplished, type and origin of the fiber may become obvious.  Fibers may also be evaluated through physical match (used when larger pieces are available and can be physically matched by site, shape, and size) and micro-chemical tests.  These various chemical reagents are used for determining physical characteristics of the fiber: melting point, density, ash formation, tensile strength and solubility; however these tests destroy the fiber.


6. Reliability of Hair and Fiber Analysis in Crime Scene Data

              Hair and fiber analysis is very reliable in crime scene data because it reveals ample information about the people involved in the crime and who could be the criminal.  Hairs can reveal the ethnicity and DNA of the individual from which it came.  With the use of DNA the crime scene investigators can identify who was at the scene of the crime and whether that person is the criminal or the victim.  Fibers in a crime scene can reveal where somebody has been.  Investigators can determine if the victim has been around the criminal due to the fibers found on them and comparing that evidence to fibers at the alleged place where the crime was performed. 


7. Famous Case Where Hair Was Used to Exonerate an Innocent Man

              James Driskell was sentenced to life in prison in 1991 when he was convicted of the murder of Perry Harder, who was killed September of 1990 in Winnipeg.  His body was found, shot several times in the chest, in a shallow grave by some railroad tracks.  Police suspected Driskell killed Harder because he was involved in a series of break-and-enters with Driskell, but Driskell denied any part in these crimes.  The Association in Defense of the Wrongly Convicted said a Winnipeg RCMP lab incorrectly analyzed three hairs used to convict Driskell. An RCMP analyst testified at the trial the hairs, found in Driskell's van, belonged to the victim; the prosecution continued to argue that Driskell murdered Harder in the van.  According to test results from the Forensic Science Services in England, none of the hairs belonged to Harder.  James Driskell sat in prison for 12 years before accurate DNA tests were taken on the hair evidence that proved his innocence.


Tuesday, November 8, 2011

Forensics Project Part I: Fingerprinting

1. History of Fingerprinting

- In 14th century Persia, various official government papers had fingerprints (impressions), and one government official, a doctor, observed that no two fingerprints were exactly alike.
- 1686
In 1686, Marcello Malpighi, a professor of anatomy at the University of Bologna, noted in his treatise; ridges, spirals and loops in fingerprints.


- 1863
Professor Paul-Jean Coulier, of Val-de-Grâce in Paris, publishes his observations that (latent) fingerprints can be developed on paper by iodine fuming and explains how to preserve (fix) such developed impressions and mentions the potential for identifying suspects' fingerprints by use of a magnifying glass.

csifingerprints.yolasite.com

- 1880
During the 1870s, Dr. Henry Faulds, the British Surgeon-Superintendent of Tsukiji Hospital in Tokyo, Japan, studied "skin-furrows" after noticing finger marks on specimens of "prehistoric" pottery. He recognized the importance of fingerprints as a to identify and devised a method of classification as well.
Also in 1880, Dr. Henry Faulds published an article in the Scientific Journal, "Nature.” He discussed fingerprints as a means of personal identification, and the use of printers ink as a method for obtaining such fingerprints. He is also given credit for first fingerprint identification of a greasy fingerprint left on an alcohol bottle.


- 1892
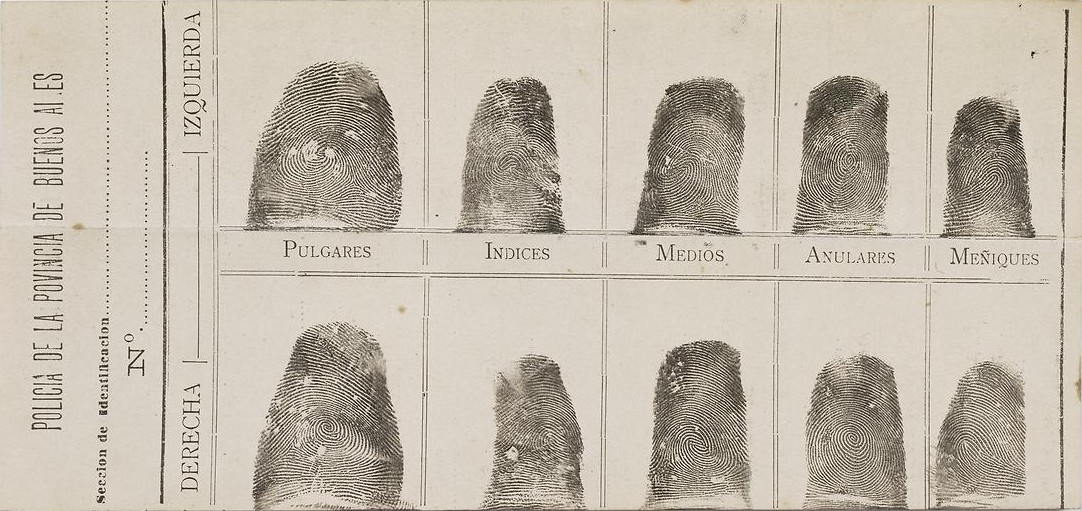
Juan Vucetich made the first criminal fingerprint identification in 1892. He was able to identify Francis Rojas, a woman who murdered her two sons and cut her own throat in an attempt to place blame on another.  Her bloody print was left on a door post, proving her identity as the murderer.

Francis Rojas' Inked Fingerprints

- 1902
The first systematic use of fingerprints in the U.S. by the New York Civil Service Commission for testing. Dr. Henry P. DeForrest pioneers U.S. fingerprinting.

- 1905
U.S. Army begins using fingerprints.
http://pulse2.com/category/united-states-air-force/

- 1907
U.S. Navy begins using fingerprints.
http://www.cagenweb.com/plumas/military.htm

- 1908

- 1946
By 1946, the FBI had processed 100 million fingerprint cards in manually maintained files; and by 1971, 200 million cards.

 
- 2011
The largest Automated Fingerprint Identification System repository in America is operated by the Department of Homeland Security's US Visit Program, containing over 100 million persons' fingerprints.


2. Types of Fingerprints

Direct:
Direct prints, also called exemplar prints, are known prints.  They are already collected prints from a person who was enrolling in a system or was under arrest at one point.  When an arrest takes place there usually are a set of direct prints with one print from each finger.  These are taken using a live scan or ink on a paper card.

Latent:
The word latent actually means hidden or invisible but in modern forensic science it is any accidental print left by the criminal whether it is invisible or not.  Electronic, chemical and physical techniques can be used to make these prints visible.  Latent prints may also be only part of the whole print, smudged, distorted or overlapped by other prints from the same or from different people.
Plastic:
Plastic fingerprints are prints that are left on a substance that retains the shape and ridges of the print.  Some examples are wet clay (which would be a perfect specimen of a plastic print) or melted candle wax.  These are very convenient when found by investigators because they need no further enhancement.


3. Techniques and Chemicals used to Develop Prints on Nonabsorbent, Porous, Hard and Smooth Surfaces
Porous Surfaces
•         D.F.O.
•         1,2 Idanedione
•         Ninhydrin
•         Iodine Fuming
•         5-MTN
•         Physical Developer
•         Zinc Chloride

Non-Porous Surfaces
•         Cyanoacrylate Ester
•         Gentian Violet
•         Small Particle Reagent

Glossy Paper
•         Cyanoacrylate Ester
•         Small Particle Reagent
•         M.B.D Dye
•         Basic Yellow 40

Metal
•         Cyanoacrylate Ester
•         M.B.D. Dye
•         Basic Yellow 40
•         Small Particle Reagent

Plastic
•         Cyanoacrylate Ester
•         M.B.D. Dye
•         Basic Yellow 40
•         Small Particle Reagent

Glass
•         Cyanoacrylate Ester
•         M.B.D. Dye
•         Basic Yellow 40
•         Small Particle Reagent

Unfinished Wood
•         Iodine Fuming
•         1,2 Idanedione
•         5-MTN
•         Physical Developer
•         D.F.O.
•         Ninhydrin
•         Silver Nitrate

Wet Surfaces
•         Physical Developer
•         Small Particle Reagent
•         Sudan Black

Adhesive Tape
•         Gentian Violet
•         Liqui-Drox
•         Liqui-Nox
•         Sticky-Side Powder

Post-Ninhydrin
•         Nickel Nitrate
•         Physical Developer
•         Silver Nitrate
•         Small Particle Reagent
•         Zinc Chloride

Multi-Colored Surfaces
(Fluorescent Techniques)
•         R.A.Y.
•         Ardrox
•         M.B.D. Dye
•         Basic Yellow 40
•         M.R.M. 10
•         Liqui-Drox
•         Rhodamine 6G
•         D.F.O.
•         Safranin O
•         Nile Red
•         1,2 Idanedione
•         Thenoyl Europium Chelate
•         R.A.M.

Ultra-Violet Induced
•         Ardrox
•         Liqui-Drox
•         Ultra-Violet Lamp
•         Silver Nitrate
•         Thenoyl Europium Chelate
•         Basic Yellow 40

Post-Cyanoacrylate
•         Ardrox
•         Basic Yellow 40
•         M.B.D. Dye
•         Nile Red
•         Rhodamine 6G
•         Sudan Black
•         Basic Red 28
•         Liqui-Drox
•         M.R.M. 10
•         R.A.M.
•         R.A.Y.
•         Thenoyl Europium Chelate

Cartridge Cases
•         Basic Yellow 40
•         Cyanoacrylate Ester

 Blood
•         A.B.T.S.
•         Amido Black – Water
•         Crowle’s Double Stain
•         Leucocrystal Violet
•         Coomassie Blue
•         Amido Black – Methanol
•         D.A.B.

Non Destructive Techniques
•         Iodine Fuming
•         Electrostatic Lifting
•         Visual Examination
•         Fluorescent Light
•         Ultra-Violet Lamp


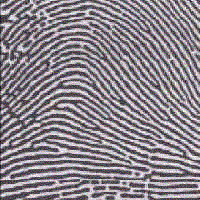
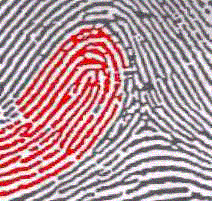
4. Basic Shapes/Patterns of Fingerprints

There are three general shapes to fingerprints: loop, whorl and arch.  All three of these categories of fingerprint have different kinds in them as well.  These are the names of all the different patterns of Fingerprints:

Arch (found in about 5% of fingerprint patterns encountered):
Plain Arch:

Tented Arch:

Loop (found in about 60%-70% of fingerprint patterns countered):
Ulnar Loop:


Radial Loop:

Whorl (found in about 25%-30% of fingerprint patterns encountered):
Plain Whorl:

Central Pocket Whorl:

Double Loop Whorl:

Accidental Whorl:


5. Procedure for Collecting/lifting Prints:

On a light surface one can use powered graphite to collect a fingerprint and on a darker surface one can use baking soda to lift a fingerprint.

1.   Identify the finger print
2.   Obtain a small paint brush
3.   Crush the graphite and obtain the baking soda
4.   Sprinkle the graphite on the light surface and the baking soda onto a dark surface with the   identified fingerprint until it covers the whole print
5.   Obtain an adhesive strip (tape) and put it over the print and be sure to cover the whole mark
6.   Remove the strip and tape it down onto a white piece of paper if graphite was used and a black piece of paper if baking soda was used
7.   Store the print in a safe place for further investigation